Installation Overview
The Freestylist is designed to be installed directly above the client’s head while seated. This exact positioning is essential to ensure smooth operation and proper weightless performance. Each Freestylist requires its own dedicated 15-amp, 120-volt electrical circuit.
The first step in planning your installation is determining which mounting method best fits your salon’s ceiling structure and layout. The Freestylist is engineered to work with a wide range of ceiling types, and the examples below will help you identify the correct solution for your space.
Installations are divided into five main categories:
• Drop ceilings / suspended tile ceilings
• Above-the-ceiling installation kits
• Rough-in installation kits
• Suspended installation kits
• Light Platforms
Important Things You Need to Know
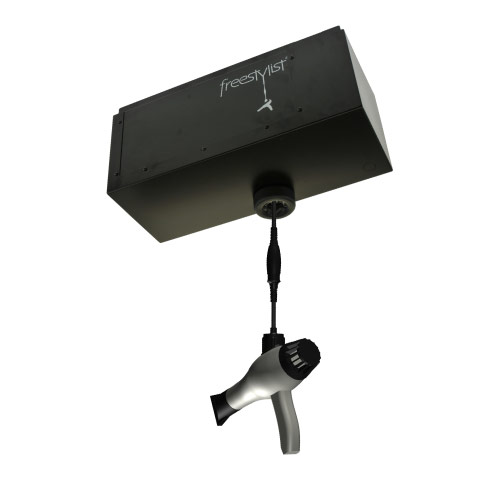
This is not a cord rewind device.
The Freestylist is a precision-engineered, free-floating dryer support system designed to support the full weight of the dryer at all times during use. For proper performance, it must be installed directly above the client’s head. Accurate positioning ensures the dryer moves smoothly and feels weightless in the stylist’s hand. Your contractor must follow the specified installation location carefully.
Accurate ceiling height measurement is critical.
Each Freestylist dryer cord is custom-cut based on the ceiling height measurement you or your contractor provide. If this measurement is off by as little as 3 inches, the unit may require modification to achieve proper performance.
Proper resting height ensures optimal ergonomics.
The dryer’s resting position is adjusted to clear the stylist’s head by approximately 1 to 4 inches. For example, if a stylist is 5′4″ tall, the bottom of the dryer handle should rest between 5′5″ and 5′8″ from the floor. Excessive clearance reduces ergonomic efficiency and diminishes the weightless feel.
Factory tension is preset for optimal performance.
The Freestylist is designed so the dryer slowly floats downward when the brake is not engaged. This is the correct factory setting. It is a common misconception that the tension should hold the dryer stationary in mid-air. Increasing tension to prevent downward movement creates resistance and reduces the weightless effect.
CRITICAL INSTALLATION REQUIREMENT
The Freestylist must be installed directly above the client’s head. Even small horizontal offsets create cord drag, increasing resistance and reducing the weightless effect. Proper vertical alignment ensures the smooth, effortless operation the system is designed to provide.
TYPES OF INSTALLATION
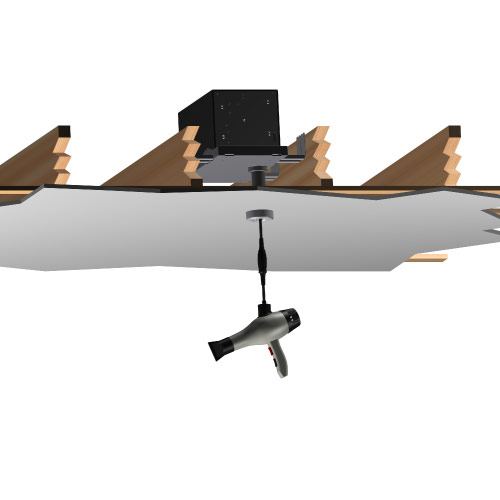
Above the ceiling installation kits
Installing the Freestylist above ceilings that are 12 feet or less in height is one of our cleanest installations. Once installed, all you see is a small cord guide in the ceiling with the Freestylist cord exiting from it.
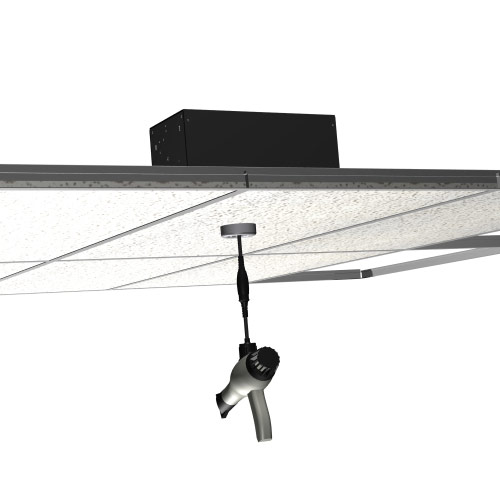
Drop Ceilings / Suspended Tile Ceilings
Installing the Freestylist into a drop ceiling is as easy as having your electrician install a light fixture. The Freestylist does not use any additional electricity, so you can use the same electrical circuits as the ones used at each station.
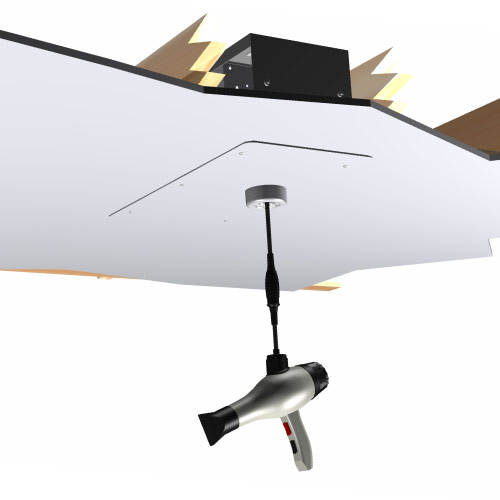
Rough-in kit
Our rough-in installation kit is very useful in ceilings where you want a clean look. They can be installed in between ceiling joists and sit flush to the ceiling.
Suspended installation
Installing the Freestylist in open and high ceilings is simple using our suspended installation kits. These kits provide a clean, professional solution while ensuring the dryer is positioned correctly for smooth, weightless operation.
There are three primary installation methods:
-
Direct Ceiling Mount (up to 12 ft ceilings)
The Freestylist mounts directly to the ceiling structure, providing a clean and stable installation. -
Threaded Rod Suspension (up to 16 ft ceilings)
Threaded rods and precision tubes suspend the Freestylist to the ideal operating height while maintaining proper alignment directly above the client. -
Unistrut Mounting (no ceiling height limitations)
The Freestylist mounts directly to structural Unistrut framing, providing maximum flexibility for open ceilings and industrial spaces.
Each method ensures proper positioning, stability, and optimal weightless performance.
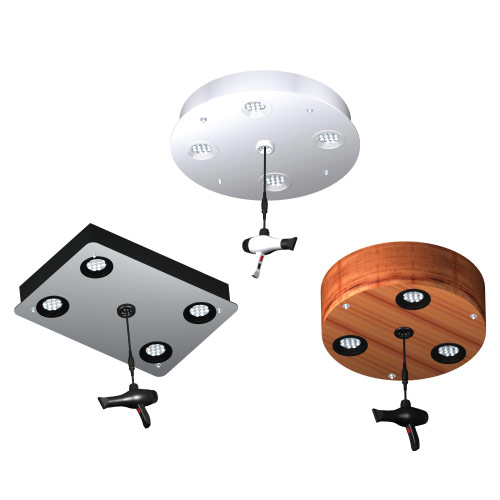
Light Platforms
The Freestylist is designed to be positioned directly above your client for optimal ergonomics and performance. When installing electrical wiring for the Freestylist, it is the ideal time to also prepare for professional station lighting.
Freestyle Systems Light Platforms provide perfectly balanced, evenly distributed illumination directly over the styling chair. The result is minimal shadows, accurate color visibility, and a clean, integrated station design.
Light Platforms combine optimal dryer positioning with professional lighting to create the ideal styling environment.
© 2025 Freestyle Systems. All Rights Reserved. Privacy Policy Terms of Use