Parts provided
• 2 Caddy brackets
• 1 DK pan
• 4 Mounting brackets
• 1 Spacer
• 1 Roller cord guide
• 1 Coupler
• 4 Sheet metal screws
• 4 Machine screws (1/4-20)
• 4 Hex nuts
• 8 Washers
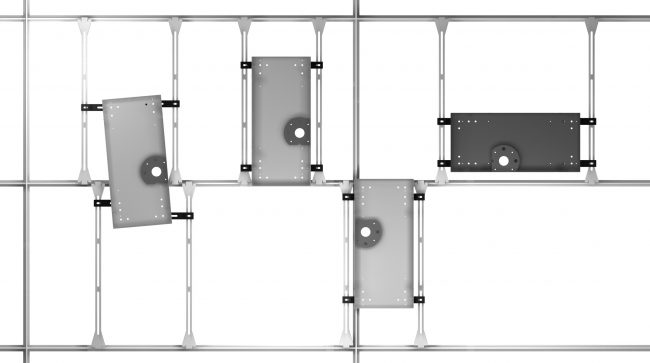
Possible positioning of Freestylist pan on drop ceiling framework.

Step one – Attach hardware to ceiling pan 1. The mounting brackets are attached to the pan with the short screws. 2. The centerline of the dryer cord should be located directly above the prospective client’s head when seated. (refer to page 1 for dryer location instructions) 3. Use option 1 or 2 for best placement of dryer cord centerline.
Step two- Install ceiling brackets and ceiling pan 1. The caddy brackets are clipped over the drop ceiling framework. Then the pan brackets are installed over the caddy brackets and attached with 4 long screws, 8 washers and 4 nuts. Position the pan and caddy brackets so the centerline is located directly above the heads of future clients when seated. 2. When the positioning is complete, tighten all the machine screws and install the baling wire to both ends of the caddy brackets, 10 to 14 gauge (not supplied). These wires should be securely mounted to the ceiling above and be able to support a 40lb load. 3. A minimum of 12” above the drop ceiling is required to install the Freestylist support system. Make sure that the hanging wires, duct work or any obstructions will not interfere when installing the ceiling tiles or the Freestylist support system.
Step three- drilling cord guide hole 1. Mark centerline of dryer cord on ceiling tile and drill a 2 1/8” hole.
Step four- Installing the Freestylist® 1. Remove 2 screws from each side of the cover (screw locations shown below). 2. Place the Freestylist onto the pan being careful to feed the Freelock™ connector through the centerline hole first. 3. Reinstall the cover screws in the same holes they were removed from, as shown below. 4. Hardwire the Freestylist with a minimum of a dedicated 120v 15amp circuit. 5. See page ii t o adjust the apparent weight and resting h eight of the dryer.
Step five – Installing cord guide
1. Attach the coupler to trim ring. For flush tiles do not use the spacer. For step down tiles insert the spacer into the trim ring. 2. Insert assembly into hole and thread into flange. If threads are too loose, use a small amount of silicone thread sealant and let set for 24 hours. 3. Ready to connect the hair dryer.
© 2024 Freestyle Systems. All Rights Reserved. Privacy Policy Terms of Use

